
Chocolate Ice-cream Bars (Eggless Homemade Recipe)
I love ice cream bars, especially chocolate ice-cream bars! Be it summer or winter, I will never say no to them. These frozen treats know no season. They are prefect to cool down during summer or to have it on a cold Christmas night next to a fire!
Disclosure: This Page May Contain Affiliate Links, Which May Earn Me A Commission, With No Additional Cost To You. Each Of These Links Are Referenced With The Asterisk Symbol * Next To It, At All Places It Is Posted.
Oh, the cheer of Christmas! How we all look forward to the holidays, spending time with our loved ones, decorating the Christmas tree and the space around and of course, the food!
Aren’t we all waiting for the time of the year when we can munch on some Christmas cookies, sip on hot chocolate and finish it all with a delicious dessert!? Talking of which, what do you think about Chocolate Ice Cream Bars decorated as reindeer? Cute, isn’t it?
So here is an easy recipe for homemade chocolate ice cream bars decorated as cute reindeers. You won’t need an ice-cream make these. They are also eggless. You can even have your kids decorate these cute bars on Christmas eve!
Ice cream bars vs popsicle
An ice cream bar is a frozen dessert on a stick or a candy bar that includes ice cream in it. Usually, the coating is a thin layer of chocolate that allows the ice cream to stay intact and not melt easily.
Wondering if it tastes anything like a popsicle? Nope, it doesn’t! Popsicle stick a.k.a ice pop is a liquid-based frozen snack on a stick.
Now, the two of these sure look quite similar to each other. However, popsicle has a texture similar to ice whereas, ice-cream is creamier and thicker.
Type of Chocolate to Use
The chocolate coat is quite an important part of this chocolate dipped ice cream bar, both in terms of the crunchy texture as well as the taste.
A high quality chocolate such as Lindt would definitely make this ice-cream taste even better and you will get a smoother coating. But you can go with any chocolate of your choice. I used Hershey’s semi-sweetened chocolate chips*.
You can even use white chocolate* or dark chocolate if you prefer that over a milk chocolate coating.
Secret ingredient for a smooth chocolate coating
The best way to thin chocolate that’s perfect for dipping is to add fat. We do this by adding oil in this recipe! Melted chocolate mixed with oil creates a silky chocolate sauce.
Vegetable oil, canola or coconut oil are the best ones to use to melt chocolate for dipping.
The recipe below produces a thick chocolate coating. If you want a thinner chocolate shell, adjust the consistency by adding more oil to the melted chocolate.
Flavor alternatives
When it comes to what ice cream flavors to use, you are only limited by your imagination. You can using any fruit flavors like raspberry, strawberry, or cherry. You can check out our no churn blueberry ice cream recipe, which is very similar to this one!
Besides fruit flavors, you can also try coffee, mint or white chocolate. Let us know which are your favorite ice-cream flavors in the comments below!
Ingredients Used And Alternatives
Heavy cream: Use full fat heavy cream. The more fat, the tastier your ice-cream will be.
Chocolate: Use semi-sweet chocolate or milk chocolate. This is for the chocolate shell around the ice-cream. Use chocolate chips or tiles. If you use unsweetened chocolate , then you might have to add powdered sugar to the ice-cream mix to your preference.
Unsweetened Cocoa Powder* – Choose from a goof brand such as Hershey’s or Ghirardelli.
Oil: I used olive oil to melt chocolates in this recipe. You can use coconut oil or any other vegetable oil.
Others: Condensed milk*, Natural vanilla extract* (optional)
How to make the perfect Chocolate Ice Cream bars
The instructions below show the detailed steps involved in making the eggless chocolate ice-cream bars. I would highly suggest going through the detailed steps and video recipe first and then move to the quick recipe which comes later.
Chocolate Ice Cream Bar
- In a small sauce pan*, add the cocoa powder and 3 tbsp of water.
- Bring the stove to low heat and keep stirring continuously. Make sure the cocoa does not get burnt.
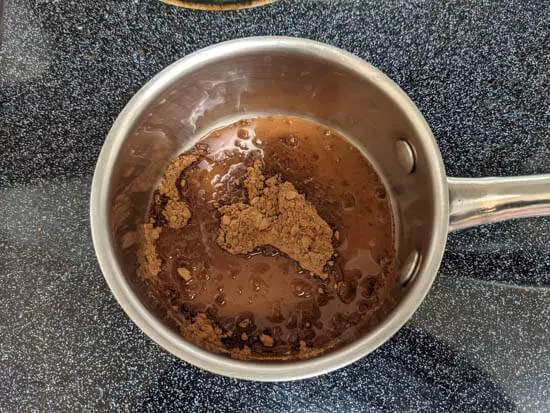
- Once you see the coca has been mixed in well, add 1/3 cup of heavy cream and mix again. You can add vanilla extract as well, though its optional. Artificial flavors have a distinct taste, so best to use natural ones.
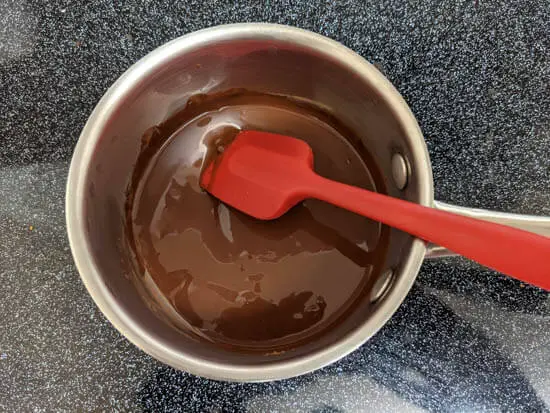
- Once everything is mixed well, you will be left with a smooth thick chocolate syrup.
- Take it off the heat and let it cool down to room temperature.
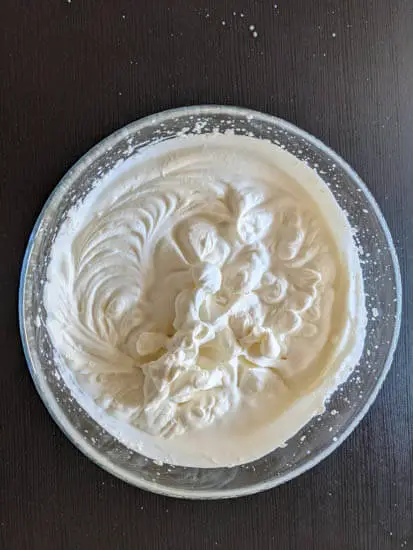
- In a large bowl*, add in the heavy cream.
- Using a handheld electric beater*, fluff up the heavy cream till you see stiff peaks.
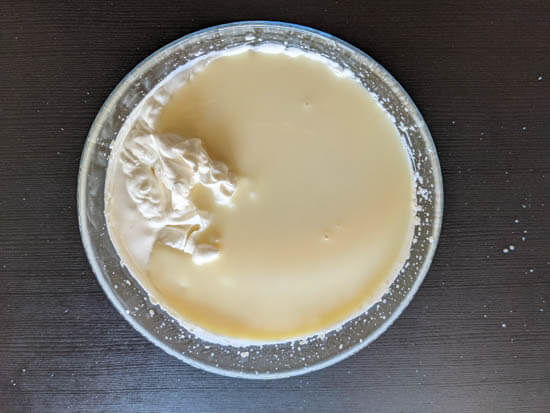
- Now add the condensed milk and the prepared chocolate syrup.
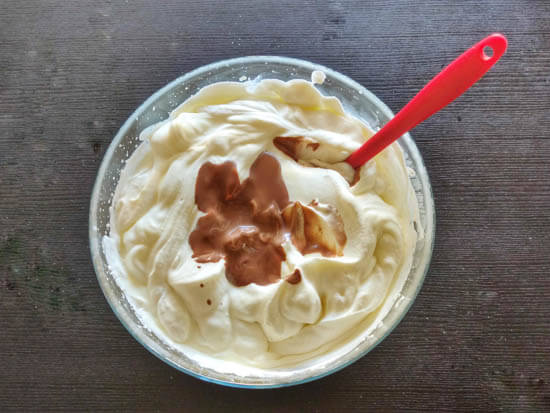
- Now slowly fold in the condensed milk and chocolate syrup into the whipped cream slowly till everything is mixed well.
- Be careful not to stir or fold vigorously. This might cause the whipped cream to deflate and become too loose.
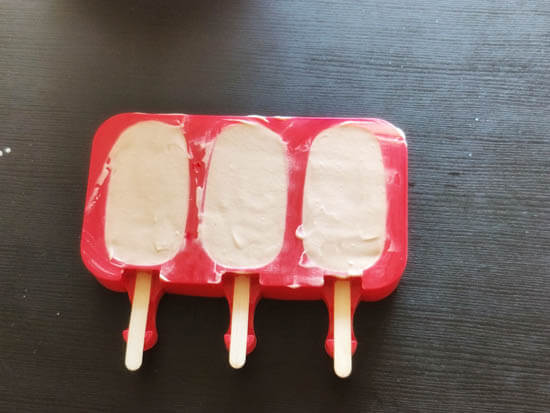
- Set up the ice-cream bar mold* ready with the popsicle-stick (same as the ice-cream stick). Don’t use popsicle molds for this since popsicles have a discernible lines and you won’t get the smooth even surface that is typical for chocolate ice cream bars.
- Pour the ice cream mixture into the mold. Scrape off any extra filling with a knife or any flat surface.
- Cover the mold and put it in the freezer.
- Freeze it overnight.
Outer Chocolate Coating
- In a small bowl, add in the chocolate chips/tiles and oil.
- Heat in a microwave* for 30 seconds and then mix. Repeat for 10 seconds, then mix. Repeat this again and again till no lumps are left. This is a great way to melt chocolate without burning it.
- If you don’t have a microwave, you can heat the bowl with the chocolate and oil over a water-bath. This will help melt as well.
- Let the chocolate cool to room temperature. While its cooling, move to the next step.
Decorating Chocolate Ice-cream Bars
- Remove the ice-cream bars from the mold. To make it easier to remove, you can run the underside of the mold with warm water for a minute and then remove the ice-cream.
- Line parchment paper* on a tray. Place the ice-cream bars on the tray and place them in the freezer.
- Once the chocolate is cooled down to room temperature, move it to a tall glass or container. The container needs to be deep enough for you to dip the ice-cream bar in fully in the chocolate.
- Take the ice-cream bars and dip one by one in the chocolate till all the ice-cream part is covered. Let the chocolate drain off the bar.
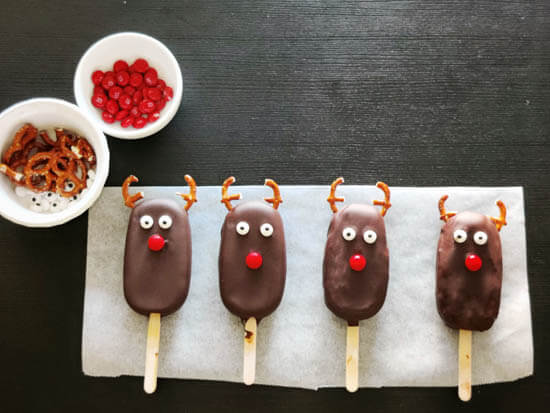
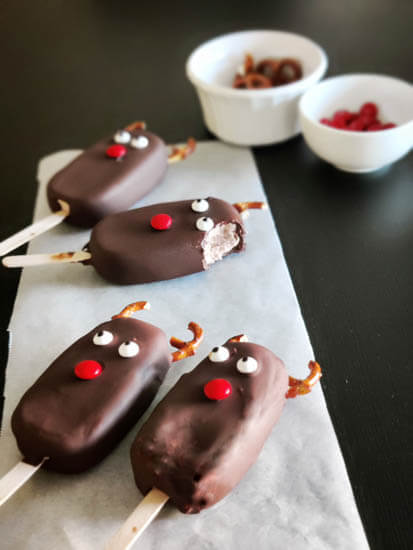
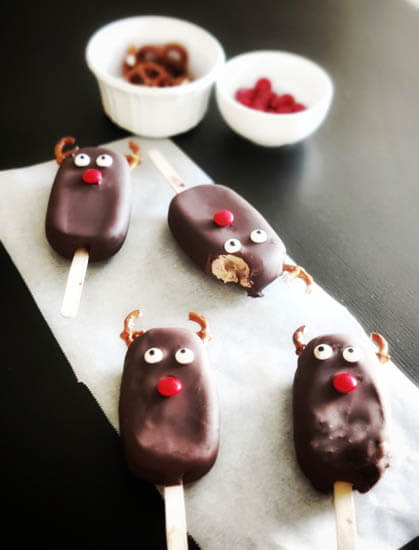
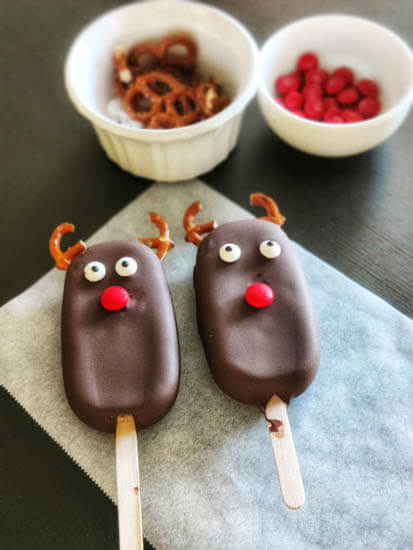
- While the chocolate is still wet, you can add any decorations. We wanted to create reindeer decors, so we broke off some pretzels to form ears, added candy eyes and red M&M’s for nose.
- Voila! Rudolf, the red-nosed reindeer! Alternatively, you can also add crushed peanuts, almonds, or Oreos on the wet chocolate.
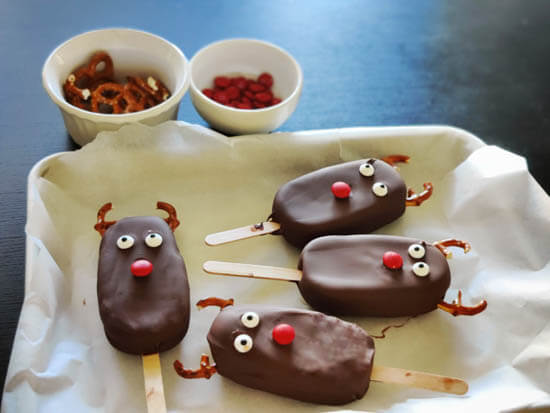
- If you cant find ready Whipped cream topped with M&Ms can work for the eyes and so can raw cacao nibs. You can also used ready-made candy-eyes, which is what we used for the eyes. For the ears, go for plain pretzel twists* and for the nose, you can use maraschino cherries, chopped strawberries or simply just red M&M’s. But of course, go crazy and creative with your toppings for this dessert.
- Hold on to the ice-cream bar for about 10 to 20 seconds and the chocolate coating should harden without taking lot of time. Now you can keep it back on the tray and freeze it again till when you are ready to have it.
- Make sure you don’t put the ice-cream bars down while the chocolate is still wet or you will end up with some ice-cream bars with a not-so-smooth finish.
- Enjoy this awesome frozen treat!
Commonly Asked Questions
How long can ice-cream bars last in the freezer?
If properly stored, these chocolate ice-cream bars can last upto 3 months in the freezer
Is it healthier to make your own ice cream?
It is definitely healthier to make your own ice-cream! Unlike store bought ones, your homemade ice-cream will not have any preservatives. It will also contain less sugar as compared to the commercial ones!

Is homemade ice cream cheaper?
It is cheaper to buy ice-cream at the store than make it home as ingredients like vanilla and heavy cream are fairly expensive.
Why does homemade ice cream melt faster than store-bought?
Homemade ice cream will melt very quickly because it contains much less air and fat than store-bought ice cream. Ice cream that contains lots of air and fat melts at a slower pace as the air insulates the ice cream against warming and the fat stabilizes the ice cream structure.
LOVE HOLIDAY BAKING??
Chocolate Ice Cream Bars
Ingredients
- 1 can Condensed milk* (300 g)
- 2 1/3 cup Heavy cream
- 3 tsp Cocoa powder*
- 3 tbsp Water
- 600 grams Semi-sweet chocolate (chips or tiles)* If using unsweetened, then add required amount of sugar to taste
- 1 tsp Natural vanilla extract* (optional)
- 6 tbsp Oil
Instructions
Chocolate Ice-Cream Bars
- Add cocoa powder and water to a small sauce pan.
- On low heat, keep stirring continuously till all the cocoa is mixed well and you see no lumps
- Once mixed well, add 1/3 cup of heavy cream and mix again.
- You can add in the vanilla extract, though this is optional
- Once you get a thick syrup, take if off heat and let it cool to room temperature
- Take the rest of the heavy cream in a large bowl and beat it using a handheld electric beater till you get stiff peaks
- Add the condensed milk and the prepared chocolate syrup.
- Gently fold in everything with a spatula. Don't stir as this could deflate the whipped up cream.
- Set up the ice cream mold ready with the ice cream stick inserted in it.
- Pour the ice cream mixture into the mold.
- Scrape off any extra filling with a knife or any flat surface.
- Cover the mold and freeze for atleast 8 hours/ overnight.
Dipping Chocolate
- The next day, take the chocolate chips and oil in a small bowl.
- Heat in microwave for 30 seconds and then mix.
- Heat another 10 seconds and mix again
- Repeat this till all the chocolate is mixed in and you see no lumps. Alternatively, you can melt the chocolate over a water bath as well
- Let the chocolate cool to room temperature
- While the chocolate is cooling, lets take the ice cream bars out of the mold.
- To make it easier, run the mold under warm water and then carefully remove the ice cream bars
- Place them on a tray lined with parchment paper and pop it in the freezer to let the ice cream bar firm up
- Move the cooled chocolate to a tall glass or container. The container needs to be deep enough to immerse the ice cream bars.
- Dip the ice cream bars in the chocolate and shake it off a bit to let the extra chocolate drain off to leave behind a thin coat/shell of chocolate.
- Just before the chocolate hardens around the ice cream bars, you can add any decors like sticking the pretzel, candy eyes and red M&M's to make Rudolf the Red-Nose-Reindeer
- The chocolate should harden within 15 to 20 seconds.
- Pop it back in the freezer or you can enjoy these right away.
Video
Notes
Did you find this recipe helpful ?? Leave me a star rating & let me know how it turned out in the comments below. Don’t forget to share with family and friends!
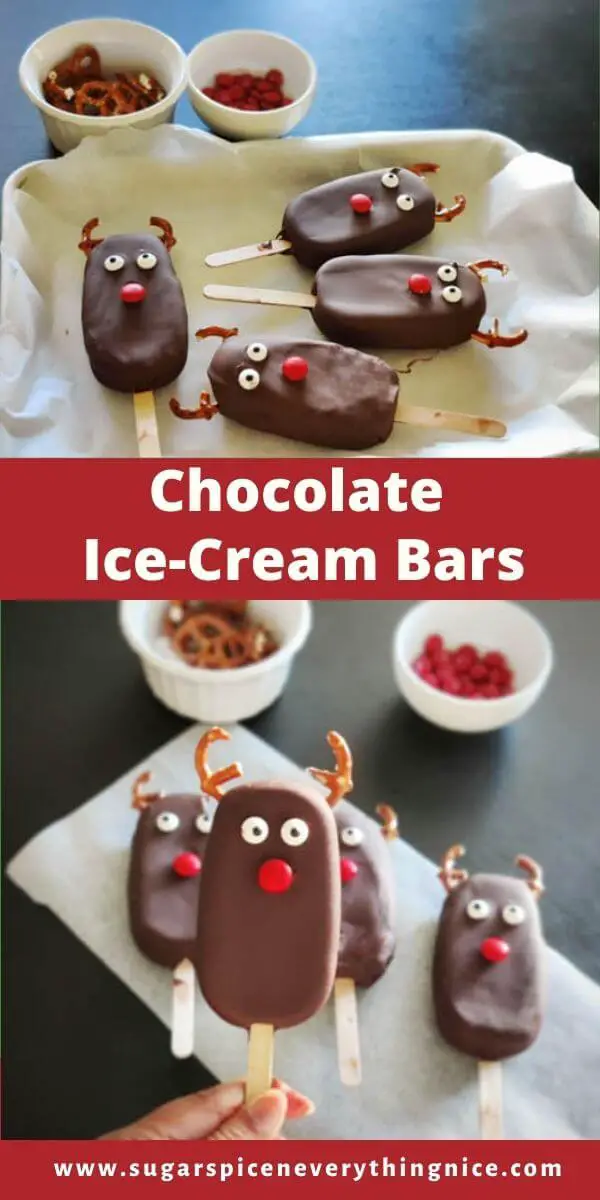
If You Found This Post Useful, PIN The Image Below To Check It Out Later!
Join Sugar Spice Community:
Facebook Group | Pinterest | Instagram | YouTube
Looking for more recipes? Sign up for our Sugar Spice newsletter and our YouTube Channel for weekly videos. Also rate, comment and share this article!
Disclosure: This page may contain affiliate links, which may earn me a commission, with no additional cost to you. Each of these links are referenced with the asterisk symbol * next to it, at all places it is posted.
About the Author

Hi! Akshita & Midhun here! Welcome to our blog where we show simple yet awesome recipes for your cravings.
Akshita being allergic to egg, we are committed to providing egg-free recipes along with some vegan friendly options. Read more about us here!
")
")
")
")
")
")
These are so cute 😍
The perfect summer treat, thanks for sharing
These are too cute!! I can’t wait to try them for Christmas!
Wow yummy 😍