The Best Vegan Challah Bread
Vegan challah bread, also known as water challah, is made without eggs but it is still soft, fluffy, and full of flavor. This beautiful bread requires no fancy ingredients, or equipment and comes together in a single bowl.
Disclosure: This Page May Contain Affiliate Links, Which May Earn Me A Commission, With No Additional Cost To You. Each Of These Links Are Referenced With The Asterisk Symbol * Next To It, At All Places It Is Posted.
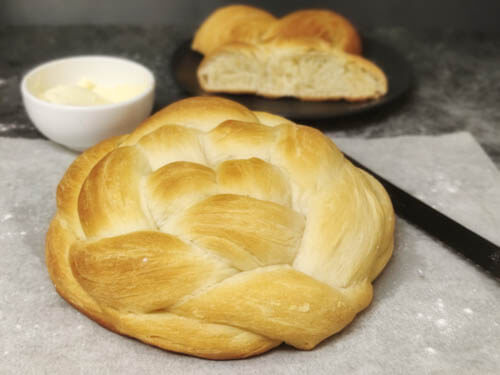
This challah recipe is simple, vegan, and anyone can make it. If you are intimidated by the braiding in challah bread, don’t be! That is the fun part!
Though I have made round challah bread, you are free to make a traditional braid or any other shape you prefer.
But if you do want to try a simpler bread with no kneading or braiding, check out my beginner-friendly focaccia recipe!
What is Challah Bread?
Challah bread is a traditional Jewish bread made with eggs and oil. It is known for its signature elaborate braids.
It is often baked for the Sabbath and other Jewish holidays. The round challah specifically is made for the Jewish New Year (Rosh Hashanah ) and in Jewish culture, it is believed to represent a crown, for crowning God as king.
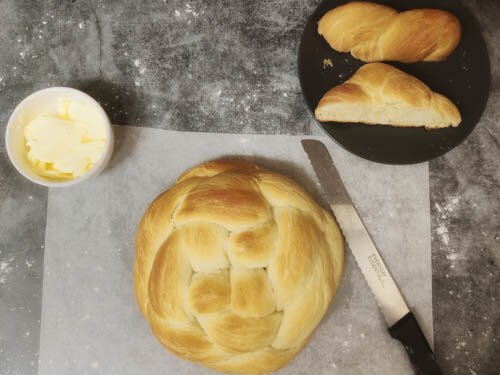
Although most challah breads contain eggs, there is a variety of challah called water challah, which does not contain any egg or dairy. This vegan challah is popular in Israel.
Note that I am not Jewish, and cannot claim to be an expert on the subject of challah, but I think (hope) that my recipe is a good one and that you will enjoy it as much as we do. We certainly can’t stop eating it!
Ingredients and Alternatives
Active dry yeast – This is what makes our bread rise and gives it that light airiness. You need to dissolve this dry active yeast in water first to activate it.
Instant yeast can also be used in its place. It doesn’t need to bloom before use. Instant yeast does make the dough rise faster than dry active yeast. So keep a close eye on the dough to make sure not to over proof it.
Granulated sugar – granulated sugar gives this vegan challah loaf its signature sweetness. Don’t substitute with maple syrup, agave, or honey as this affects the overall moisture level in the dough.
Olive oil – I used olive oil for this recipe. But if you don’t like its taste, you can use any neutral-tasting oil instead such as avocado, grape seed, coconut oil, vegetable oil, or canola oil.
All-purpose flour – You may be able to use bread flour or a combination of all-purpose flour and bread flour but I haven’t personally tried it and can’t vouch for it.
Others – Water, kosher salt, baking powder
How to make the best vegan challah
This is the best vegan challah recipe! It is a pretty easy recipe but I highly recommend watching the video to see how to do the braiding if you are new to making challah!
Activate the yeast
In a small bowl, add yeast, a pinch of sugar, and 1 cup of lukewarm water at 110 F and mix. Let it sit for 5 minutes or till it blooms.
It’s really important to use WARM water and not HOT water, ie water temp no more than 110F or you may kill the yeast in this water challah recipe.
If you are using instant yeast, you can skip this step as it doesn’t need to be bloomed.
Add wet ingredients to dry ingredients
Once the yeast has bloomed, add 2 tbsp of the oil to it and mix. In a separate medium bowl make egg replacement by mixing 3 tbsp of oil, 3 tbsp of warm water, and baking powder. Then, in a large mixing bowl, mix the flour, sugar, and salt.
Add in the prepared yeast mixture and the egg replacement into the large bowl with flour mixture. Mix with a spatula or wooden spoon to combine and once the mixture becomes a bit thicker, use your hands.
Make challah dough
Add in a little bit of flour, about a tbsp at a time while mixing the dough with your hand. Knead gently till the dough becomes smooth and evenly combined as you see in the video.
First rise
Grease the sides of the bowl with some oil. Leave the dough in the oiled bowl, cover it with a damp towel or plastic wrap and let it rise on the counter for 2 hours or until doubled in size.
Knockout air from the dough
After 2 hours, transfer the dough onto a floured work surface. Knead gently to get out any air bubbles and form a log shape.
The goal is to knock out some of the air in the process but still keep the dough soft and fluffy. Do not over-knead the dough as it will make the dough tough and it will be harder to braid.
Shape the dough
Divide dough into 6 equal parts. For the braided design of the Challah we have shown, you only need 4 pieces. The other two parts can be used to make smaller braids for practice.
Roll out each of the 4 pieces into thin long strips. Lay out the four strips in the form of tic-tac-toe with each braid going over and under the other.
It could get a bit confusing so check out the video to see how the next few steps are done. Braid the strips as shown. Tuck any extra length under the braided dough.
Second Rise
Line a baking pan with parchment paper. Transfer the dough carefully onto the lined baking tray. Cover with a damp cloth and let it rise for 1 more hour.
** I missed out on showing this step in the video**
Egg wash substitute
After the second rise, brush the dough with some olive oil. You can also glaze the challah with agave nectar or any other egg wash substitute.
Bake vegan challah
Bake in a pre-heated oven at 325 F for 25-30 minutes. After baking, let the bread cool for 5 minutes on a wire rack to cool a little. Serve it warm. It goes awesome with vegan butter!
NOTE: Do not cover hot challah as it will get soggy!
If you enjoyed this recipe, check out my list of 23 vegan bread recipes that you should try next!
How do you know when the vegan challah is done baking?
Vegan challah is done baking when the top of the challah isn’t soft and it has a golden brown color. Challah that has been baked well will sound hollow if you lightly tap it with your fingers.
Recipe Variations of Vegan Challah
This vegan recipe makes simple, plain challah. But you can make it your own by using this delicious vegan challah recipe as a guide.
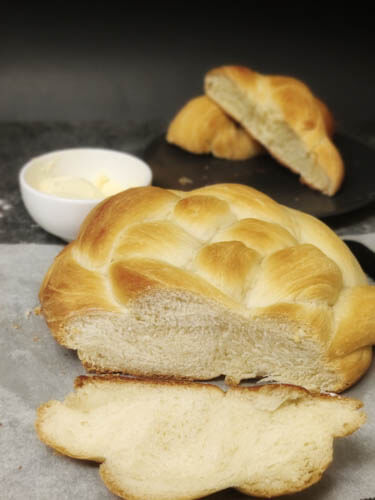
Make sweet challah by adding raisins, saffron, chocolate, coffee, cinnamon, etc in the dough. Check out cranberry orange bread, or star bread recipe if you are a fan or sweet bread.
To make this recipe savory, add herbs like Dill, Zaatar spice, different types of cheese, pesto, etc.
Storing Vegan Challah
Vegan challah is best eaten the same day it is baked. But it will still be good for another 2-3 days if stored in an airtight container at room temperature.
I recommend making vegan french toast with a day or two-old challah. Do not store the bread in the fridge as it can make the challah go stale faster.
Freezing and Reheating Vegan Challah
You can place the vegan challah in an airtight container or freezer-safe bag and freeze it for 2-3 months.
You can freeze it as a whole or cut the bread and freeze it in slices. It is best to freeze it on the day it is baked (after it has cooled) to preserve freshness.
To reheat, thaw the whole loaf completely, and warm up in a 350-degree in oven for 15 minutes for that freshly baked taste. Or take out single slices one at a time, and pop right into the toaster.
Serving Vegan Challah
Vegan challah can be served as an afternoon snack just as it is or with a side of vegan butter or jam and can also be dipped in soup.
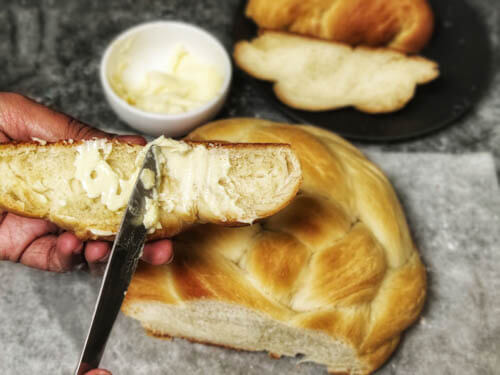
This vegan challah is also perfect to make french toast and can be used to make sandwiches as well.
Tips to make the best Vegan Challah
- Activate your yeast properly. To do this, make sure your yeast is not expired and the water is warm but not too hot (110F). Otherwise, the yeast will not activate and you will not get a pillowy rise on the bread.
- Challah dough is slightly sticky. Do not add too much extra flour and make it dry.
- While kneading the dough after the rise, make sure you do not over-knead it. The purpose of kneading is to knock out some of the air in the dough but if you knock all of it out, the resulting dough becomes too tough to work with.
- Make sure to watch the video before braiding the dough and follow the recipe closely.
- Don’t bake on a plain baking sheet, always use a greased baking mat or parchment, or else the bottom cooks too fast and may burn.
LOOKING FOR MORE VEGAN RECIPES??
Here are some of my favorite ones, that I am sure you would love –
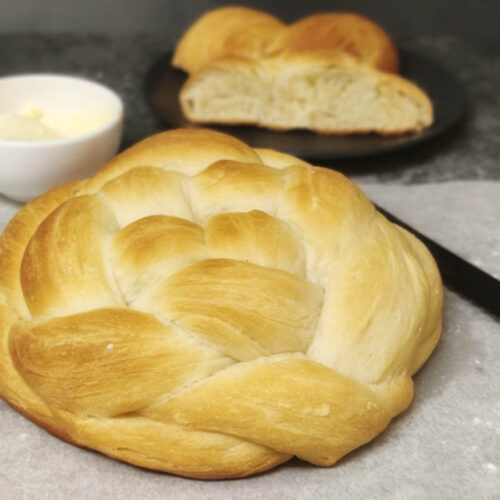
The Best Vegan Challah Bread
Ingredients
- 1.25 oz Dry active yeast Approximately 7 g
- 1/2 cup Granulated sugar Plus a pinch
- 1 cup Warm water at 110 F + 3 tbsp separate
- 6 tbsp Olive oil Or any other cooking oil
- 2 tsp Baking powder
- 3 cups All purpose flower
- 1.5 tsp Salt
Instructions
- In a small bowl, add yeast, a pinch of sugar and the 1 cup of warm water at 110 F and mix. Let it sit for 5 minutes or till it blooms.
- Once its bloomed, add 2 tbsp of the oil and mix.
- In a medium sized bowl, mix 3 tbsp of oil, remaining 3 tbsp of warm water and baking powder. This is the egg replacement.
- In a large bowl, add the flour, sugar and the salt. Whisk till combined.
- Add in the prepared yeast mixture and egg replacement to the flour mixture. Mix with a spatula and once the mixture becomes a bit more thick, use your hands.
- Add in little bit more flour, about a tbsp at a time while mixing the dough with your hand. Knead gently till the dough becomes smooth and evenly combined as you see in the video.
- Grease the inside of the bowl with some oil. Leave the dough in the bowl, cover it with a damp towel and let it rise for 2 hours or until doubled in size.
- After 2 hours, take the dough out, place it on a floured surface and knead it into a log. The goal is to knock out some of the air in the process but still keep the dough soft and fluffy. Do not over-knead the dough as it will make the dough tough.
- Cut the log into 6 equal pieces.
- For the braided design of the Challah we have shown, you only need 4 pieces. The two extra piece can be used as practice braiding.
- Roll out each of the 4 pieces into thin long strips.
- Lay out the four strips in the form of tic-tac-toe with each braid going over and under the other. It could get a bit confusing so check out the video to see how the next few steps are done.
- Braid the strips as shown. Tuck any extra length under the braided dough. Let the dough rise for 1 more hour (I forgot to show this step in the video).
- Afrer the second rise, brush the dough with some olive oil.
- Line a baking pan with parchment paper. Transfer the dough carefully on to the pan.
- Bake in pre-heated oven at 325 F for 25 minutes
- After baking, let the bread cool for 5 minutes on a wire rack. Serve it warm and goes awesome with butter!
Video
Notes
- Activate your yeast properly. To do this, make sure your yeast is not expired and the water is warm but not too hot (110F). Otherwise, the yeast will not activate and you will not get a pillowy rise on the bread.
- Challah dough is slightly sticky. Do not add too much extra flour and make it dry.
- While kneading the dough after the rise, make sure you do not over-knead it. The purpose of kneading is to knock out some of the air in the dough but if you knock all of it out, the resulting dough becomes too tough to work with.
- Make sure to watch the video before braiding the dough and follow the recipe closely.
- Don’t bake on a plain baking sheet, always use a greased baking mat or parchment, or else the bottom cooks too fast and may burn.
Did you find this recipe helpful ?? Leave me a star rating & comment about it or any recipe idea you would love to see. Don’t forget to share with family and friends!
If you found this post useful, PIN the image below to your
“Vegan Bread” Board on Pinterest to check it out later
Join Sugar Spice Community:
Facebook Group | Pinterest | Instagram | YouTube
Looking for more recipes? Sign up for our Sugar Spice newsletter and our YouTube Channel for weekly videos. Also rate, comment and share this article!
Disclosure: This page may contain affiliate links, which may earn me a commission, with no additional cost to you. Each of these links are referenced with the asterisk symbol * next to it, at all places it is posted.
About the Author

Hi! Akshita & Midhun here! Welcome to our blog where we show simple yet awesome recipes for your cravings.
Akshita being allergic to egg, we are committed to providing egg-free recipes along with some vegan friendly options. Read more about us here!

